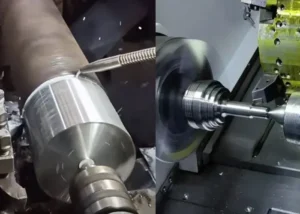
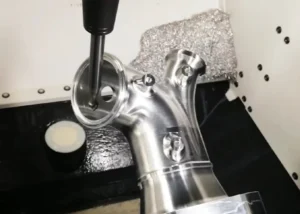
In everyday metalworking, cutting fluid is like the “blood” of the equipment;
Its performance directly affects the quality of the workpieces, the service life of the cutting tools, and the health of the machine tools.
Keeping the cutting fluid in optimal condition is key to ensuring efficient and stable production.
However, cutting fluid is not a “set-it-and-forget-it” solution; it gradually degrades over time.
Regular replacement is not merely a routine task but an important maintenance measure based on scientific judgment.
Replacing it too early leads to waste, while replacing it too late can damage equipment and products.
So, how can you accurately determine when to replace cutting fluid?
This article provides a systematic and professional method for making that determination.
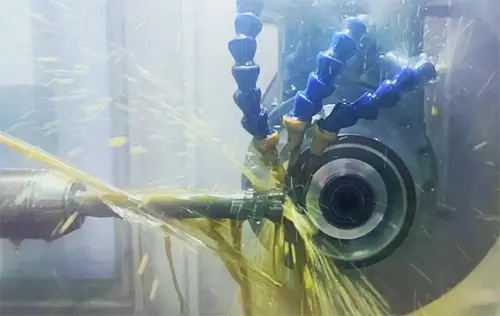
Appearance and Odor: The Most Intuitive Initial Assessment
Observe Color Changes
Fresh cutting fluid is typically clear and transparent or has a uniform color.
Once it begins to degrade, its appearance changes significantly: it becomes cloudy, darkens or turns black, and may even exhibit signs of separation, such as oil floating on the surface or sediment settling at the bottom.
These signs clearly indicate that the cutting fluid has severely deteriorated.
Check for Changes in Odor
Normal cutting fluid usually has only a faint chemical odor or is nearly odorless.
If you detect a pungent, sour smell, a putrid odor, or a foul smell resembling rotten eggs during inspection, these are typical signs of massive bacterial growth and solution spoilage, and immediate action should be taken.
Concentration Changes: A Key Indicator of Performance Assurance
Why Does Concentration Decrease?
During the machining process, cutting fluid is continuously consumed through evaporation, removal by workpieces, and splashing.
The water content decreases even more rapidly, leading to a drop in the concentration of active ingredients.
Insufficient concentration directly weakens the fluid’s lubrication, rust prevention, and cooling performance.
How to Test Accurately?
Regular testing must be conducted using professional tools.
A refractometer is a commonly used tool for rapid on-site concentration testing, but care must be taken to account for compensation values.
For applications requiring higher precision, titration can be used to perform laboratory-grade accurate measurements.
Once the concentration falls below the manufacturer’s recommended minimum, fresh fluid should be added promptly to restore the concentration.
If the system is severely out of balance, a complete replacement should be considered.
pH Changes: A “Barometer” of Solution Stability
The Dangers of a Declining pH
Under ideal conditions, cutting fluid should be slightly alkaline. As it degrades, its pH gradually decreases (becomes more acidic).
An acidic environment accelerates corrosion of machine tools and workpieces, provides a breeding ground for microorganisms such as anaerobic bacteria, and hastens the deterioration of the cutting fluid.
How to Test?
Measure the pH regularly using precision pH test strips or an electronic pH meter.
When the pH consistently remains below 8.0 (this value is for reference only;
Please follow the technical specifications of the product you are using), it indicates that the solution’s stability is being compromised, and you should exercise extreme caution.
If the pH cannot be adjusted back to a safe range by adding additives, the fluid must be replaced.
Bacterial Growth: The Invisible “Performance Killer”
Consequences of Bacterial Proliferation
Excessive bacterial growth—particularly that of anaerobic bacteria—breaks down the active ingredients in cutting fluids, producing acidic substances and foul odors, and secretes a viscous biofilm (the “stringy” phenomenon), which clogs filters and pipes, severely affecting machining results and the workshop environment.
How to Identify It?
In addition to obvious odors and a sticky texture, you can also commission a professional organization to conduct bacterial content testing.
If the total bacterial count exceeds 10⁵ CFU/mL, it is generally considered to be severely above the standard.
Simply adding a biocide may have limited effectiveness; the most thorough solution is to perform a system flush and fluid change.
Deterioration in Machining Performance: A Reflection of Final Quality
The ultimate purpose of cutting fluid is to ensure machining quality.
Any deterioration in its performance is directly reflected in the product and the tools:
Deterioration in workpiece surface quality: Insufficient lubrication leads to a significant increase in workpiece surface roughness, resulting in surface finish that fails to meet specifications.
Reduced tool life: Weakened cooling and lubrication properties lead to accelerated tool wear and an abnormally high frequency of tool changes.
Loss of machining accuracy: Deteriorated coolant affects the stability of the machining process, potentially causing deviations in product dimensional accuracy.
If you observe any of the above machining quality issues, after ruling out other factors, you should first suspect and inspect the condition of the coolant.
Equipment Maintenance: Proactive Management and Prevention
Regular Cleaning and Fluid Replacement
It is essential to establish a regular schedule for machine tool cleaning and fluid replacement.
Strictly avoid the practice of simply topping off the fluid without replacing it, as this only accelerates the degradation of the new fluid.
Thoroughly removing sludge, metal chips, and bacterial film from the machine tool fluid tank is fundamental to ensuring the service life of the new fluid.
Installing Filtration Systems
Installing filtration systems (such as centrifuges or paper-tape filters) for centralized fluid supply systems or individual machines can effectively remove impurities and surface oil, significantly extending the service life of the cutting fluid.
This delays replacement cycles at the source and reduces costs.
Summary
Determining when to replace cutting fluid is a process that requires comprehensive consideration from multiple perspectives.
We recommend that companies establish a regular inspection system, incorporating visual appearance, odor, concentration, and pH level into their daily inspection checklist, while closely monitoring changes in machining quality.
Through scientific monitoring and proactive maintenance, you will not only be able to accurately identify the optimal replacement time and ensure smooth production operations, but also effectively reduce overall production costs.