Quality control is a significant and important topic in the manufacturing industry. It involves not only the quality of its own products and the quality control system, but also the management of the factory.
Since the Industrial Revolution, all countries have developed a deep understanding of quality control and have conducted in-depth research and exploration.
Pre-Industrial Era: Skilled craftsmen were solely responsible for the quality of their work. Inspection was manual and based on personal expertise.
Industrial Revolution (18th–19th Century): With mass production, uniformity became essential. Simple inspection techniques were introduced to check finished products.
In the early 20th century, pioneers such as Frederick Taylor and Henry Ford introduced standardized work methods and inspection processes in factories.
1930s: Walter A. Shewhart developed Statistical Process Control (SPC) at Bell Labs, marking the beginning of modern quality control.
Post-World War II, W. Edwards Deming and Joseph Juran introduced comprehensive quality management systems in Japan, which led to the global rise of Total Quality Management (TQM).
Modern Era: Today, quality control is data-driven, often integrated with CNC systems and Industry 4.0 technologies (e.g., in-line measurement, AI-based defect detection, and automated feedback loops).

How important is CNC turning in high-precision parts machining?
Improvement of machining accuracy.
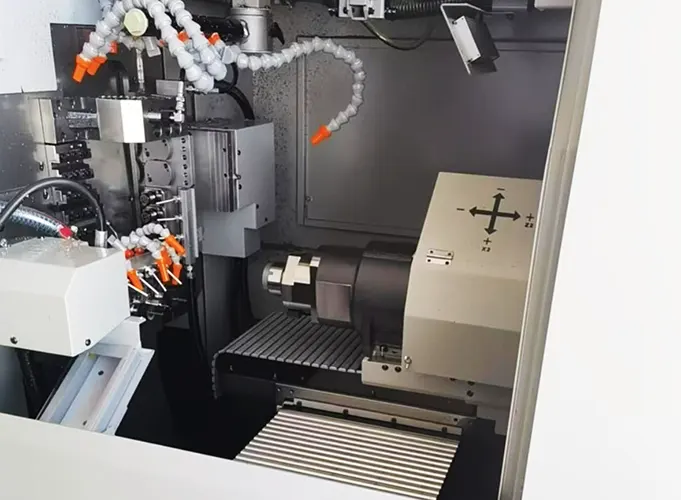
CNC lathe can realize precise control of the machining process through the computer control system.
This control enables the cutting speed, feed, depth of cut, and other machining process parameters to be accurately set and adjusted, ensuring the accuracy of part processing.
Compared to traditional manual operation or simple mechanical control, CNC turning can significantly improve machining accuracy to meet the needs of high-precision part processing.
Ensure the processing quality.
CNC turner not only has the ability of high-precision machining, but is also able to optimize the machining process and parameter settings to ensure the processing quality of parts.
For example, in the machining process, a CNC turner can automatically carry out tool compensation and workpiece size detection, timely detection and correction of machining errors, to ensure the dimensional accuracy and shape accuracy of parts.
Improve production efficiency.
CNC turning features high automation and intelligent capabilities, which can significantly enhance production efficiency.
In the machining process, a CNC turner can automatically complete the workpiece clamping, positioning, cutting, and testing processes, reducing manual intervention and waiting time.
At the same time, CNC turners are also capable of producing multiple varieties and small batches, enabling them to meet market demand for rapid response to high-precision parts.
This efficient production method not only reduces production costs but also improves the market competitiveness of enterprises.
Promote the development of the manufacturing industry.
With the continuous development of the manufacturing industry, the demand for high-precision parts is increasing.
CNC turning is a crucial tool for high-precision part processing and a technical means; its level of development will directly impact the overall level of the manufacturing industry.
Therefore, to strengthen the research, development, and application of CNC turning technology, improve the processing accuracy and efficiency of CNC turning, and promote the development of the manufacturing industry is of great significance.
Necessity of quality control of CNC turning high-precision parts processing
Ensure product quality and performance.
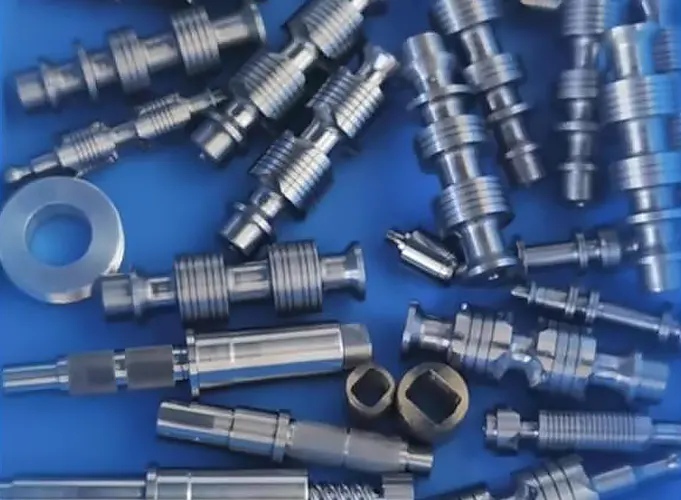
The machining quality of high-precision parts has a decisive impact on the overall performance of the product.
Through the implementation of effective quality control strategies, CNC turners can ensure that they strictly adhere to predetermined process parameters and operating procedures during the machining process, thereby reducing machining errors and improving the dimensional accuracy, shape accuracy, and surface quality of the parts.
This not only meets the product design requirements but also ensures that the product has excellent performance and stability during use.
Improve productivity and reduce costs.
Effective quality control strategies can optimize the machining process of CNC turners, reduce unnecessary downtime and debugging time, and improve productivity.
At the same time, by reducing machining errors and scrap rates, it can lower production costs and enhance the economic efficiency of the enterprise.
Additionally, stable product quality can also reduce the costs of after-sales maintenance and returns, thereby further lowering the enterprise’s operating costs.
Enhance enterprise competitiveness and market position.
The processing quality control strategy for high-precision parts is a crucial indicator of an enterprise’s technical and management capabilities.
Through the implementation of an effective quality control strategy, the enterprise can continuously improve its technical and management levels, enhance product quality and performance, thereby improving its competitiveness and market position.
In fierce market competition, only enterprises with high-quality products and excellent management can gain a larger market share and customer recognition.
Responding to industry challenges and market demands
With the continuous development of the manufacturing industry, market demand for high-precision parts is increasing, while the industry’s requirements for product quality and performance are also becoming increasingly higher.
In response to these challenges, enterprises must implement effective quality control strategies.
By optimizing the machining process, enhancing equipment precision, strengthening personnel training, and implementing other measures, enterprises can continually improve their processing capabilities and technical level to meet market demand and industry development requirements.

Quality Control Strategy in CNC Lathe Machining
Pre-Machining Strategies
Effective quality control in CNC lathe machining begins long before the first chip is cut. Pre-machining strategies focus on verifying the integrity of materials and the readiness of machinery to ensure precision, minimize errors, and reduce waste.
a. Material Inspection
Material Certification
Before machining begins, it is crucial to verify that all incoming raw materials meet the specified requirements.
This includes checking the material’s grade, hardness, and chemical composition against purchase specifications or engineering drawings.
Certificates of Conformance (CoC) or Mill Test Reports (MTRs) should be reviewed and filed. This process ensures the use of compliant materials and helps trace any potential defects back to their source.
Dimensional Verification
Each bar stock, billet, or preform must be measured before being loaded onto the lathe.
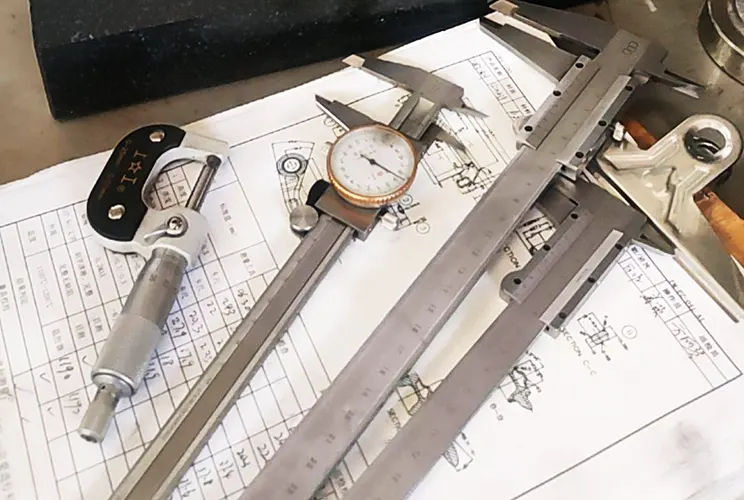
Technicians utilize precision instruments, such as digital calipers, micrometers, and Coordinate Measuring Machines (CMMs), to verify the dimensions of incoming materials.
Ensuring that the starting dimensions fall within allowable tolerances helps reduce rework and guarantees compatibility with the programmed machining process.
b. Machine Calibration
Axis Alignment
Regular calibration of machine axes—typically the X and Z axes in CNC lathes, and the Y axis in multi-axis machines—is essential for maintaining positional accuracy. Misalignment can lead to tapering, out-of-roundness, or incorrect threading.
Using laser alignment tools or dial indicators, maintenance teams check for deviations and make necessary adjustments to ensure linear accuracy.
Spindle Runout
Spindle runout refers to the amount of deviation from actual rotation—excessive runout results in uneven cutting, a poor surface finish, and dimensional errors. Operators routinely check spindle concentricity using dial test indicators.
Monitoring and minimizing spindle runout is crucial for maintaining tight tolerances, especially in high-speed or precision turning operations.
Tool Offset Verification
Tool offsets dictate the precise cutting position of each tool relative to the workpiece. Incorrect or outdated offsets can cause dimensional inconsistencies and part rejection.
Therefore, machinists must ensure all tool offsets are accurately measured and updated in the machine controller. Tool presetters, probe systems, or manual methods with gauge blocks are typically employed for this task.
In-Process Control
Once the CNC lathe begins operation, maintaining high-quality output depends on the ability to control and monitor machining conditions in real time.
In-process control strategies help detect issues early, maintain consistency, and reduce the risk of scrap or rework.
Real-Time Monitoring
Sensors and Probing
Modern CNC lathes are often equipped with in-machine probes that enable real-time measurement of critical part features during the machining cycle.
These probes can measure dimensions such as diameters, lengths, and surface positions without requiring the part to be removed from the machine.
This capability not only shortens inspection time but also allows immediate correction of deviations, improving process accuracy and consistency.
Tool Wear Detection
Tool condition directly impacts surface finish and dimensional accuracy. Advanced CNC systems utilize tool wear monitoring technologies, including acoustic emission sensors, spindle power analysis, and vibration monitoring.
These systems detect abnormal patterns that indicate tool degradation or breakage, allowing timely intervention to replace or adjust tools before defective parts are produced.
Process Stability Checks
First Article Inspection (FAI)
At the beginning of each production batch or setup change, a full inspection is performed on the first machined part—this is known as First Article Inspection.
FAI validates the accuracy of the machine setup, including tool offsets, fixturing, and program parameters. Only after the first part passes all dimensional and functional checks does the batch proceed, reducing the chance of systematic errors affecting an entire run.
Statistical Process Control (SPC)
To ensure ongoing quality throughout a production run, Statistical Process Control is applied. SPC involves measuring key dimensions from samples and plotting the data on control charts.
By monitoring variations over time, operators can identify trends or shifts in the process before they lead to out-of-tolerance conditions. This proactive approach helps maintain process capability and reduces variation in final products.
Environment Control
Temperature Compensation
CNC lathes generate heat during operation, which can cause thermal expansion of both the machine and the workpiece. Without compensation, this thermal drift can lead to dimensional inaccuracies.
Some advanced lathes incorporate thermal sensors and software algorithms to apply real-time temperature compensation, ensuring stable and precise machining even under fluctuating thermal loads.
Vibration Isolation
Environmental vibrations—originating from nearby machinery, foot traffic, or structural resonance—can affect machining precision. To combat this, CNC lathes are often installed on vibration-dampening mounts or placed on isolated foundations.
Proper machine placement and isolation reduce micro-movements that can lead to poor surface finishes and dimensional errors, especially in fine turning or finishing operations.
Post-Machining Inspection
After CNC lathe operations are completed, a comprehensive post-machining inspection ensures that each part meets dimensional, surface, and material specifications before being approved for use or delivery. This phase plays a crucial role in final quality validation and traceability.
Dimensional Inspection
Coordinate Measuring Machines (CMM)
For parts with complex geometries, tight tolerances, or multi-surface features, CMMs provide high-precision, automated dimensional verification.
By utilizing probing systems or laser scanning, CMMs can compare actual part dimensions to CAD models or technical drawings, generating detailed reports.
This method is especially crucial in industries such as aerospace, medical, and automotive, where geometric precision is non-negotiable.
Profile Projectors / Optical Comparators
These optical inspection tools are valuable for checking contours, edge radii, thread forms, and small features that are hard to access with contact tools.
By projecting the magnified silhouette of the part onto a screen, operators can compare it directly to overlays or digital profiles to assess conformance with design intent.
Manual Gauges
For quicker, on-the-spot checks, skilled operators use manual measuring tools such as digital calipers, micrometers, and bore gauges.
These tools are efficient for verifying critical dimensions like outer diameters, internal bores, groove widths, and thread depths—especially during in-line inspections or spot checks.
Surface Finish Inspection
Surface Roughness Tester
Surface texture has a direct influence on functional performance, particularly in sealing, bearing, or sliding applications.
Surface roughness testers—also known as profilometers—measure Ra (average roughness), Rz (peak-to-valley height), and other parameters to quantify finish quality.
These instruments help ensure the turned surfaces meet required smoothness and texture levels, often specified in microns or microinches.
Hardness and Material Testing
Post-Machining Hardness Testing
When machining components that undergo heat treatment or require specific mechanical properties, verifying hardness is essential.
Rockwell, Vickers, or Brinell hardness tests may be conducted on the finished part to verify that the material meets the specified requirements. This is especially critical in safety- or stress-critical components used in aerospace, medical, and defense sectors.
Material Validation
In some cases, further non-destructive testing (NDT) or spectroscopic analysis may be employed to verify material composition, particularly when alloy integrity or control of trace elements is crucial.
This adds another layer of quality assurance for industries with strict regulatory standards.

Documentation and Traceability
Beyond physical inspection and measurement, a robust quality control strategy in CNC lathe machining must include thorough documentation and traceability.
These records not only provide proof of compliance but also support continuous improvement, root cause analysis, and customer confidence, especially in regulated industries.
Inspection Reports
Detailed Records for Every Part and Batch
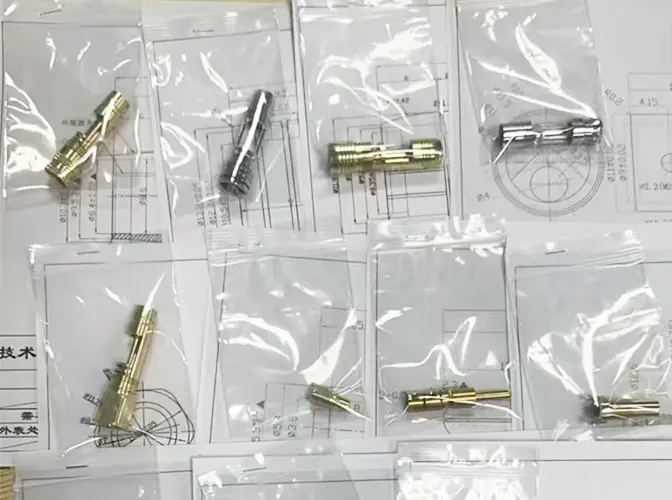
Inspection reports compile the results of dimensional checks, surface finish evaluations, and material tests. Each report is linked to specific part numbers, revision levels, and production batches.
These documents serve as official quality records, ensuring that all specifications have been met before shipment. In many cases, customers require these reports for quality audits or as part of First Article Inspection (FAI) documentation.
Reports typically include:
Measured values vs. nominal dimensions
Surface roughness data
Inspector initials and timestamps
Equipment used for measurement
Non-Conformance Reports (NCR)
Managing and Correcting Quality Issues
When a part fails to meet specifications, a Non-Conformance Report (NCR) is generated. This document details the nature of the defect, the affected batch, and possible causes.
NCRs serve as the starting point for corrective actions and may involve scrapping, reworking, or accepting the part with a deviation waiver.
An effective NCR process includes:
Description of the non-conformity (e.g., over-tolerance diameter)
Photos or measurement data
Responsible departments (e.g., machining, programming)
Disposition decision: rework, scrap, or use-as-is with approval
Documenting non-conformances enables manufacturers to identify recurring issues and implement long-term improvements.
Tool Life Records
Tracking Tool Wear for Predictive Maintenance
Tool performance directly impacts part quality. Maintaining detailed tool life records allows for proactive replacement of cutting tools before they cause out-of-tolerance conditions. These records track:
Tool usage hours or the number of parts produced
Signs of wear or failure
Surface finish quality over time
Correlation with material type and machining parameters
By analyzing tool life data, manufacturers can implement predictive maintenance schedules, enhance process stability, and minimize downtime and scrap resulting from unexpected tool failures.
Continuous Improvement Practices
Quality control in CNC lathe machining is not a static process—it demands continuous evaluation and enhancement.
By adopting continuous improvement practices, manufacturers can identify the root causes of defects, eliminate process variations, and foster a culture of operational excellence.
These practices not only boost product quality but also enhance efficiency, reduce costs, and improve customer satisfaction.
Root Cause Analysis (RCA)
Getting to the Source of Problems
When recurring defects or deviations are detected, Root Cause Analysis (RCA) is used to investigate and identify the underlying reasons systematically.
RCA goes beyond immediate symptoms to uncover process flaws, equipment issues, or human factors that contribute to quality problems.
Common RCA tools include:
5 Whys Technique: Asking “why” repeatedly to drill down to the fundamental cause.
Fishbone Diagrams (Ishikawa): Visualizing potential sources of problems, such as machines, methods, materials, and manpower.
Failure Mode and Effects Analysis (FMEA): Assessing the risk and impact of potential failures before they occur.
By resolving issues at the root, RCA minimizes the likelihood of repeated errors and improves long-term process reliability.
Corrective and Preventive Actions (CAPA)
Eliminating Variability and Strengthening Processes
Once the root cause is identified, Corrective and Preventive Actions (CAPA) are implemented. Corrective actions address the immediate problem, such as adjusting machine offsets or replacing worn tools. Preventive actions go further, introducing safeguards to avoid similar issues in the future—like updating machining programs or enhancing inspection frequency.
An effective CAPA system typically includes:
Description of the issue and root cause
Action plan with assigned responsibilities and deadlines
Effectiveness verification to ensure the problem has been resolved
By institutionalizing CAPA, CNC operations become more robust, data-driven, and resistant to production errors.
Operator Training and Standardized Work Instructions
Empowering Personnel for Consistency and Accuracy
Human error remains a significant source of variation in machining environments. Ongoing training equips operators with the knowledge and skills to handle machines, tools, and inspection equipment effectively.
Standardized work instructions—documented and accessible—ensure that each operator follows best practices for setup, operation, and inspection.
Training programs may include:
Equipment-specific certifications
Quality awareness workshops
Hands-on training with CMMs, surface testers, and gauges
Updates on software, materials, or safety protocols
By investing in people and enforcing consistency, manufacturers can enhance process stability and reduce variation from one shift to the next or from one batch to the next.
Conclusion
CNC turning high-precision parts machining quality control is a complex and systematic project that needs to be comprehensively considered and implemented from the aspects of personnel training and management, equipment maintenance and repair, machining process and quality control, as well as data monitoring and analysis.
By optimizing the above aspects, it can ensure the stability and reliability of high-precision CNC turning parts machining to meet user needs and market requirements.
In the future, with the continuous development of intelligent manufacturing technology, high-precision parts machining is expected to evolve in the direction of higher precision, greater efficiency, and lower costs.
At the same time, it is also necessary to pay attention to the development of new technologies, processes, and materials, and continually promote the progress and innovation of high-precision parts machining technology.
FAQ
Quality control in CNC turning ensures dimensional accuracy, surface finish, and part performance. It reduces machining errors, minimizes rework, and guarantees that finished components meet stringent industry standards.
CNC turning allows precise control of cutting parameters like speed, feed, and depth, ensuring high repeatability and accuracy. Advanced features such as tool compensation and real-time monitoring further enhance machining precision.
Material inspection verifies that raw materials meet required specifications in grade, hardness, and composition. Using certified materials reduces defects and ensures traceability for critical parts.
SPC in CNC turning involves monitoring part dimensions during production using control charts. It detects trends and variations early, helping operators prevent out-of-tolerance conditions and maintain process consistency.
In-machine probes and sensors in modern CNC lathes measure features during machining without removing the part. This enables instant corrections, reduces inspection time, and maintains consistent part quality.
FAI is the thorough inspection of the first part from a new batch or setup. It validates tool offsets, fixturing, and machining parameters, ensuring that all subsequent parts meet required specifications.
Tool wear affects surface finish and dimensional precision. Monitoring tool condition using sensors or analysis systems prevents defects, reduces scrap rates, and ensures consistent quality output.
Post-machining dimensional inspection uses CMMs, profile projectors, and manual gauges to verify that part dimensions align with design tolerances. This final check guarantees readiness for assembly or delivery.
Well-trained operators ensure consistent machine operation, tool setup, and inspection. Standardized work instructions and ongoing education minimize human error and enhance machining reliability.

