How to fold sheet metal into a box for fabrication projects?
How to Fold Sheet Metal into a Box for Fabrication Projects
If you’re an engineer with a manufacturing background, you know how crucial it is to have the right fabrication techniques at your disposal. One common method in manufacturing is folding sheet metal into a box.
This process requires precision and expertise to ensure that the final product meets the necessary specifications.
Processing Flow
Step 1: Gather the Necessary Tools and Materials
Before you begin the folding process, it’s essential to gather all the tools and materials you’ll need.
This includes the sheet metal you’ll be working with, a ruler or measuring tape, a marker for marking your measurements, safety gloves and goggles, a metal brake for bending the sheet metal, and clamps to hold the metal in place during bending.
Step 2: Measure and Mark the Sheet Metal
The next step is to measure and mark the sheet metal according to the dimensions of the box you want to create.
Use a ruler or measuring tape to ensure precise measurements, and mark the metal with a marker at the points where you will be making your bends.
This will help guide you during the folding process and ensure that the box is the correct size.
Step 3: Set Up the Metal Brake
Once you have your sheet metal marked, it’s time to set up the metal brake for bending. Make sure the brake is securely fastened to a stable surface and adjust the bending leaf to the correct angle for your bends.
The angle will depend on the design of the box and the thickness of the sheet metal you’re working with.
Step 4: Make the Bends
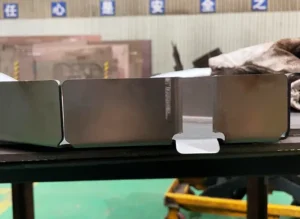
With the metal brake set up, you can now make the bends in the sheet metal to form the box shape. Place the marked metal into the brake, making sure it is aligned properly with the bending leaf.
Use the clamps to hold the metal in place, and slowly lower the bending leaf to create the bend. Repeat this process for each side of the box until the desired shape is achieved.
Step 5: Check for Accuracy
After all the bends have been made, it’s crucial to check for accuracy in the box shape. Use a ruler or measuring tape to ensure that all sides of the box are the correct length and angle.
Make any necessary adjustments by re-bending the metal if needed to achieve the desired shape.
Step 6: Join the Edges
Once you’re satisfied with the shape of the box, it’s time to join the edges to complete the fabrication process. You can use welding, riveting, or adhesives to connect the edges of the metal together securely.
Make sure the edges are aligned properly before joining to ensure a tight fit.
Step 7: Finish the Box
After the edges are joined, you can finish the box by smoothing out any rough edges or surfaces with a file or grinder. You can also add any necessary reinforcements or supports to strengthen the box if needed.
Once the finishing touches are complete, your sheet metal box is ready for use in your fabrication project.
Conclusion
Folding sheet metal into a box for fabrication projects requires careful planning, precise measurements, and skilled execution.
By following the steps outlined in this article and using the right tools and materials, you can create a sturdy and functional box that meets your project requirements.
Remember to always prioritize safety when working with sheet metal and follow proper procedures to avoid accidents or injuries.
With practice and experience, you can master the art of sheet metal folding and enhance your fabrication skills as an engineer in the manufacturing industry.


1 thought on “How to fold sheet metal into a box for fabrication projects?”
CNC heads will love this.